[2017.6 Digital Twin] From Arduino to Server through Raspberry
From Arduino to Server through Raspberry
the major task of the raspberry is to transfer the date from arduino to the server though the Internet.
In order to use raspberry work as a transfer. It needs some basic works to do.
- download system on the card.
- enable serial transport. so that it can be confirgured by serial line.
- enable remote desktop.
- receive serial data from arduino.
- enable ftp server, so that it can get files from computer
- java program, deliver serial data to server.

some useful commands of the raspberry.
0. get app
sudo spt-get ...
apt-get remove ...
apt-get remove ...
install ....
1. get IP address
hostname -I
ifconfig
2.How to run a bash file
https://learn.pimoroni.com/tutorial/bash/getting-started-with-bash
nano hello.sh
#!/bin/sh
echo Hello
>chmod +x hello.sh
>./hello.sh
chmod +x give the file a Executable permission. Without that it muss use
bash ____ to run the script!
my script for pi4j
#!/bin/sh
sudo java -classpath .:classes:'*':classes:/opt/pi4j/lib/'*' Main
automatically run
https://www.raspberrypi.org/documentation/linux/usage/rc-local.md
sudo nano /
---------------------------screen------------------------------------
sudo apt-get install screen
screen -S
ctrl + c creat a new window
ctrl + n next window
ctrl + k kill
----------------------------------------------------
1. serial


>auto join network
ifconfig
2.How to run a bash file
https://learn.pimoroni.com/tutorial/bash/getting-started-with-bash
nano hello.sh
#!/bin/sh
echo Hello
>chmod +x hello.sh
>./hello.sh
chmod +x give the file a Executable permission. Without that it muss use
bash ____ to run the script!
my script for pi4j
#!/bin/sh
sudo java -classpath .:classes:'*':classes:/opt/pi4j/lib/'*' Main
automatically run
https://www.raspberrypi.org/documentation/linux/usage/rc-local.md
sudo nano /
---------------------------screen------------------------------------
sudo apt-get install screen
screen -S
ctrl + c creat a new window
ctrl + n next window
ctrl + k kill
----------------------------------------------------
1. serial

for the new verson of raspberry, it just enable serial and disable bluetooth. and it works.

to connect with wifi, can use these follow commands
>Scan wifi list
sudo iwlist wlan0 scan
>auto join network
sudo nano /etc/wpa_supplicant/wpa_supplicant.conf
ctrl_interface=DIR=/var/run/wpa_supplicant GROUP=netdevupdate_config=1country=GBnetwork={ssid="....."psk="...."key_mgmt=WPA-PSK}
ctrl_interface=DIR=/var/run/wpa_supplicant GROUP=netdevupdate_config=1country=GBnetwork={ssid="....."psk="...."key_mgmt=WPA-PSK}
----------------------------------------------------
3. remote desktop
https://www.raspberrypi.org/documentation/remote-access/vnc/README.md
login in raspberry:
username: pi
password: raspberry
username: pi
password: raspberry
Change resultion of VNC desktop
To change the resolution, run the command sudo raspi-config, navigate to Advanced Options > Resolution, and choose an option.------------------------------------------------------
5. ftp
https://www.raspberrypi.org/documentation/remote-access/ssh/sftp.md
1. download client

-----------------------------------------------------
4.receive serial data from arduino.
sudo apt-get install minicom
sudo minicom -b 9600 -D /dev/ttyACM0

4.receive serial data from arduino.
sudo apt-get install minicom
sudo minicom -b 9600 -D /dev/ttyACM0
--------------------------------------------------------------
6.java program, deliver serial data to server.
http://pi4j.com/install.html
sudo curl -s get.pi4j.com | sudo bash
CODE TEST Version
Arduino
#define Input_Pin 2
#define Led1_Pin 12
void setup() {
Serial.begin(9600);
TimeSetup();
pinMode(2,INPUT_PULLUP);
pinMode(12,OUTPUT);
digitalWrite(12,0);
StartNewTimer(1000,1,Time_Event1);
}
// StartNewTimer(1000,1,Time_Event1);
void loop() {
TimerLoop();
}
void Time_Event1(){
StartNewTimer(1000,1,Time_Event1);
if(!digitalRead(Input_Pin)){
digitalWrite(Led1_Pin,!digitalRead(Led1_Pin));
}else{
digitalWrite(Led1_Pin,1);
}
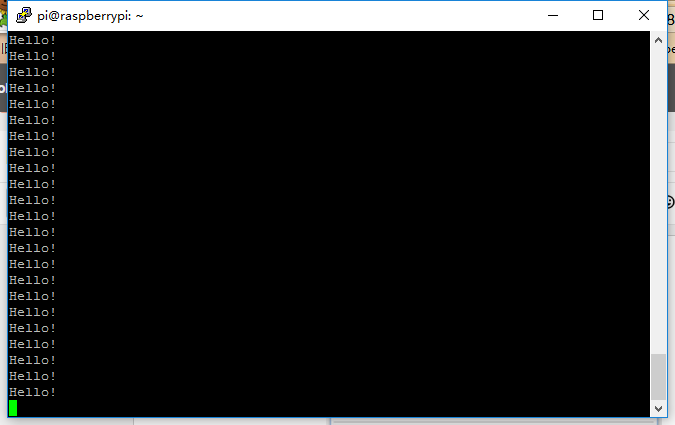
Serial.println(F("Hello!"));
}
Respberry
Main.java
import java.io.IOException;
import com.pi4j.io.serial.Baud;
import com.pi4j.io.serial.DataBits;
import com.pi4j.io.serial.FlowControl;
import com.pi4j.io.serial.Parity;
import com.pi4j.io.serial.Serial;
import com.pi4j.io.serial.SerialConfig;
import com.pi4j.io.serial.SerialDataEvent;
import com.pi4j.io.serial.SerialDataEventListener;
import com.pi4j.io.serial.SerialFactory;
import com.pi4j.io.serial.StopBits;
import com.pi4j.util.Console;
public class Main {
private static Console con;
private static Serial serial;
private static MClient mclient;
public static void main(String[] args) throws InterruptedException{
con=new Console();
con.title("MyIOTProject","Edit by Aixi Guo");
con.promptForExit();
mclient=new MClient();
mclient.start();
serial = SerialFactory.createInstance();
serial.addListener(new SerialDataEventListener(){
//
@Override
public void dataReceived(SerialDataEvent event) {
try {
//
String hex=event.getAsciiString();
String asc=event.getHexByteString();
//db.writeBuff(hex,asc);
con.println("[HEX DATA] " + event.getHexByteString());
con.println("[ASCII DATA] " + event.getAsciiString());
//con.println(db);
} catch (IOException e) {
e.printStackTrace();
}
}
});
try {//
SerialConfig config = new SerialConfig();
config.device("/dev/ttyACM0")
.baud(Baud._9600)
.dataBits(DataBits._8)
.parity(Parity.NONE)
.stopBits(StopBits._1)
.flowControl(FlowControl.NONE);
con.box(" Connecting to: " + config.toString());
serial.open(config);
//
while(con.isRunning()) {
try {
Thread.sleep(50);
}
catch(IllegalStateException ex){
ex.printStackTrace();
}
}
}catch(IOException ex) {
con.println(" ==>> SERIAL SETUP FAILED : " + ex.getMessage());
return;
}
}
}
MClient.java
import java.io.BufferedReader;
import java.io.BufferedWriter;
import java.io.IOException;
import java.io.InputStreamReader;
import java.io.OutputStreamWriter;
import java.io.PrintWriter;
import java.net.Socket;
public class MClient extends Thread{
private static final int PORT = 8080;
private Socket socket;
private BufferedReader in;
private PrintWriter out;
MClient() {
try {
Socket socket = new Socket("192.168.2.110", PORT);
System.out.println("socket = " + socket);
in = new BufferedReader(new InputStreamReader(socket.getInputStream()));
out = new PrintWriter(new BufferedWriter(new OutputStreamWriter(socket.getOutputStream())),true);
out.println("All");
} catch (IOException e) {
System.out.println(e.toString());
} finally {
}
}
public void run(){
while(true){
try {
Thread.sleep(1000);
String str = in.readLine();
System.out.println(str);
out.println("Hello Server");
} catch (InterruptedException e) {
e.printStackTrace();
} catch (IOException e) {
e.printStackTrace();
}
}
}
public void sendData(String str){
}
public void closeClient(){
System.out.println("closing...");
try{
socket.close();
}catch(IOException e){
System.out.println(e.toString());
}
}
}
Server
import java.net.*;
import java.io.*;
public class Server {
public static final int PORT = 8080;
public static void main(String[] args)
throws IOException
{
ServerSocket s = new ServerSocket(PORT);
System.out.println("Started:"+s);
try{
Socket socket = s.accept();
try{
System.out.println("连接被接受"+socket);
BufferedReader in =
new BufferedReader(new InputStreamReader(socket.getInputStream()));
PrintWriter out =
new PrintWriter(
new BufferedWriter(
new OutputStreamWriter(socket.getOutputStream())),true);
while(true){
String str = in.readLine();
if(str.endsWith("END")) break;
System.out.println("Echoing: "+str);
out.println("Server: I receive");
}
}
catch(Exception e)
{ System.out.println(e.toString());}
finally{
System.out.println("closing ...");
socket.close();
}
}
finally{
s.close();
}
}
}


评论
发表评论